Friday, February 18, 2011

A Fashion Video or How I turned into Paul Greengrass

Even though I am currently pretty fucked off at a bunch of young photographers who seem determined to screw me around (and they wonder why i dont like using assistants) i have gotten around to doing some work. A week or two ago I did a shoot for Gelieft Bridal and Pret-A-Porter. While i did the shoot I screwed around a bit with some video and made this short little video for them at the same time.
I am quite happy with the results but since i am not Paul Greengrass i have realised that i seriously need to get some kind of stabilising system to become less shaky.

Enough bitching for today. I will get back to work now.


Tuesday, January 18, 2011

169

here is the music video


Monday, September 20, 2010

not a Para-athlete but an athlete none the less


This was bloody difficult to get. With a limited shutter-speed of 1/200th I had to get this image just right when the ball is in picture. The problem was of course that that meant I had to snap at the moment when the ball went through a space of about 1 meter wide while the ball was traveling at about 80 km/h. not easy. This was of course the second photo I took. the really frightful thing is that I was in the cage with the him while he was swinging and the ball passed less than 50cm away from me. Thanks to JK for not breaking my camera or my face.


Para-Athletes continued


I am now mostly finished with the athletes and have recently started with the swimmers. More about that later. This is the last of the para-athletes I took photos of. Lize won 3 medals at the Beijing Paralympics. the dude, whose name now escapes me, is currently training for the next games in London.

Tuesday, August 17, 2010

Maties Paralympics Medal Winners


Continuing in my current series of photos on Athletes I recently took photos of the Maties Medal Winners at the 2008 Beijing Paralympics. Group photos can be quite difficult if you want a soft enveloping light. If you dont have a huge 2m parabolic dish the solution can be quite simple. I use a 1.8 m scrim diffuser that I place before two 500W lights. I raise this light to about waist height. I make sure to get a bit of hair light by placing two 300W strobes to the sides of the group, giving them a bit of highlight from the back. To get a group together for a final photo is of course quite difficult. If you are not working with professional models that chances that all three people will have a good face at the same time decreases exponentially. In the end you will just need to take quite a few photos and do some photoshop if it needs it. I did minimal photoshop in this image though. I just darkened the sky and the background with a bit of burning. I did include a photoshop fault in this image. Check if you can see it.


Tuesday, August 10, 2010

Athletes Take 1


i am currently doing a series of photos about the athletes from my local university. I started with the sprinter, who, big bonus was a reasonably attractive fellow (Like Jane Bown's Editor said to her, "make sure its a good looking turnip"). The lighting for it was quick and easy to do. I used two 500W strobes placed about 1.5 meter from him on either side. the Strobes were on backlight stands to bring the lights down low so that i could get the light in under him when he is in the Ready position. I also used a reflector to try and get a little bit of light into his face so thåt the shadow that appeared on his face became slightly lighter. I used 1/200th and an Fstop of F22 to compensate for the light and make sure the darkground will be dark as this was shot in broad daylight.

In post production I to take some random guys that was standing in the background out. There was also a big lighting pole that showed up that I also had to remove. Final Result... not too shitty.

Tuesday, June 15, 2010

Behind the scenes video from a shoot

i did this shoot for Chew magazine last year. While doing it I asked one of the styling assistants to just take some video footage of what is going on during the shoot. I finally took some time out and edited it down to a manageable size. I also try and put a few details about the lighting arrangement throughout the shoot.

Thursday, May 13, 2010

Bring out the Gimp!


Had a very interesting shoot yesterday with some fetish-gear. Lots of shiny latex with all kinds of studs and rings thrown in.

The client wanted the photos to be very dramatic with mostly a black background. Black on Black? Never a good idea. To solve this problem I used two Softboxes with grids on shining from the sides of the model. The lights were carefully set to make sure that no light falls on the background. Normally I would use a light like this paired with a reflector from the front to make sure the persons face is brought out of the shadows. For this photo though i chose not to, getting a Rorshach Test effect on the face that seemed to please the client. With this amount of light i ended up shooting at f16 at 1/160.

Here is a little bit of diagram to show the setup.


Monday, May 10, 2010

Quirky Lifestyle


The Quality of the brief the photographer gets is a very important but sometimes a very underestimated part of any commissioned shoot. I recently did a shoot for a small UK Based jewelry company and needless to say, their briefs were not up to scratch. It had very little direction and contained no images. Instead we were referred to a variety of websites, all whose content change almost daily, as an example of what the company likes. I gave the same brief to a number of different stylists and the ideas they came up with were miles apart. Some of them were high gloss and glamorous, others were quirky and indie.

In normal circumstances, a brief would have been prepared properly by the commissioning company. The photographer and stylist would have, in reply to this, created a treatment, that is 4 or 5 pages of what they ideas they have about style, that would have been then signed off by the client. The photographer would then prepare a detailed Pre-pro (pre-production notes) that will include all the relevent information.

But once again. If the original brief does not have some kind of style direction in you can prepare a treatment that will be completely different to what the client wants.

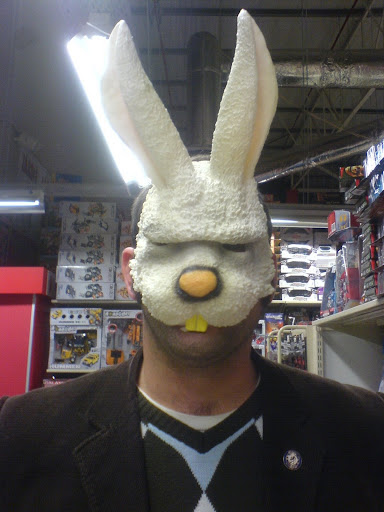
For the lighting geeks out there: On this shoot I used one big softbox that was directly above the camera. In fact, I was half wedged under the softbox and sometimes stood in front of it. This keeps the lighting setup nice and simple which suits the effect. I rarely like over-elaborate lighting, except when I have quite a few people in the shoot, the multiple lights is a must. Because the two subjects were so close together in this shoot, elaborate lighting was not necessary so the basic Butterfly set-up was enough.


Thursday, April 15, 2010

Trains Cars and Automobiles...


In preperation for a cover shoot i have to do for a magazine i had a quick play with the lights in our backyard. On hand was my brother in law's new Subaru WRX. It took me few moments to remember what i did last time and how to get the lights right but i got it in the end with only 4 lights. Your are not going the get the qaulity of shot you will be able to get in a studio with an adjustable ceiling but for location shoots this is just fine. I am throwing a few diagrams in for those of you that are technically minded.

I had four lights, two 500W strobes and two 300 W strobes. The 300's i put alongside the car, seperating the car from them witha big scrim (white, almost translucent material stretched over a frame). The two 500W's I fitted with Softboxes. The one I put on high level to the back bumper of the car while i had the bigger of the two softboxes flat in front of the car. I shot then from this angle. When i wanted to do a shot from a higher angle I also had to raise the lights to make sure i get more light on the roof of the car.

There are a lot of different ways to get this right but I have always found that simple is sometimes the best.
Here is the photos to have a look. i did have to get the obligatory photo of the proud car-owner of course....


Afternoon Rant

From behance
After a request from some of my students on how to get their photos with that nice old aged effect so used by current photographers i have decided to put a few photos up that I have done like this to give you few pointers.

Photography pointers: Forget all the rules you are supposed to use when taking photos. This type of photography is not about structure but about spontaneity. Use a flash and it doesn't matter if you have shadows on your images, it is part of the appeal. If you do have access to one use a ring-flash if you can. Don't worry about slight movement of the camera or the person. The blur ads to the effect... (you wont get published in Vogue this way).

Photoshop Pointers: Once you have your images that has been perfectly exposed you need to lighten all your images just a tad to make sure the software that we are going to use wont make them too dark. Now go to the website Action Central and download some of the actions there. the ones I used for these photos were the Muted Fashion action and the Editorial action.
Download the action. Open photoshop and your image. Double click on the action that you have downloaded. it will now be in your photoshop Actions panel.
Go to Window in the Photoshop Command bar and choose Actions (alt f9). You will now see that these actions have been added to the standard actions that photoshop has. All you need to do now is run the action by pressing the play button on the bottom line of the Action-window. The computer will now do the work for you.

Easy-peasy. Now you just need to take some more arbitrary photos and send them off to some hip indy magazines and publishing is in your future!


New Times

I have decided to go ahead and redo my whole website. Being in education now for some time Ihave decided that i will from now show you all the work i have done, as far as is contractually possible of course and show everybody how it is done. some of it is difficult, some of the work is easy. Here I will blow open the veil of secrecy and show you how to make shortcuts.
hope you enjoy it
theunis